

Video Copilot Element 3d Motion Design Pack
As a motion designer, one of the most exciting announcements in Creative Cloud for me was the strategic partnership between Maxon and Adobe. A large percentage of motion designers spend most of their time working directly between these two applications and, whilst there was a pipeline between the two, there was always room for improvement. Now we have Cinema 4D Lite, which enables designers to create assets that are ready to composite in After Effects CC.
Previously, one of the most awkward things for me used to be exporting camera data and render passes - when making amendments this process would become very tedious in terms of re-importing. Now the process is a lot more streamlined, with the option to handle this all in real-time inside After Effects CC.
Behance
Another great new feature arrives in the ability to upload straight to Behance, which is undoubtedly the best online platform out there for getting recognition for your creative work - it means you can share your work quickly with your clients or peers. This feature will only become better when the cloud file storage system is introduced in the near future - enabling you to add Behance projects directly from your Creative Cloud file storage.
This tutorial is intended as an introduction to all of these features. We will be looking at using a vector asset from Illustrator CC and taking it through C4D Lite and then into After Effects CC, walking through the new workflow features, before finally uploading to Behance.
01. Select your vector file
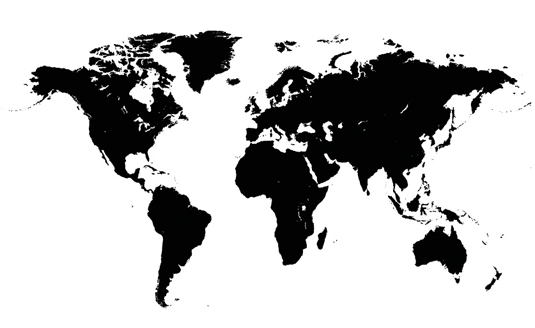
For the purpose of this walkthrough, we're going to start with a vector file of a world map. A similar one of these can be obtained simply by searching online for 'World Map Vector' - there are a lot of free ones like this that are available for public use. But you can draw one if you wish.
02. Open Illustrator CC

In order to bring your vector file into Cinema 4D Lite, it needs to be saved in Illustrator 8 format. Fire up Adobe Illustrator CC, navigate to File>Save As, choose a filename in the first dialog box and make sure it's a ai vector, then in the second dialog box choose Illustrator 8 as the version.
03. Move into Cinema 4D Lite
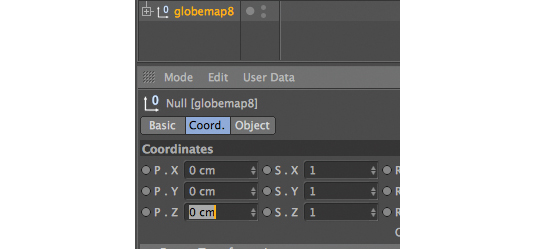
Open up Cinema 4D Lite (which comes with After Effects CC), go to File>Open and select the .ai file you just created. Select the parent object and zero out the coordinates by entering a value of 0 in X, Y and Z. We then need to select all objects in the hierarchy, right-click and go to 'Connect objects and delete'.
04. Apply a wrap effect
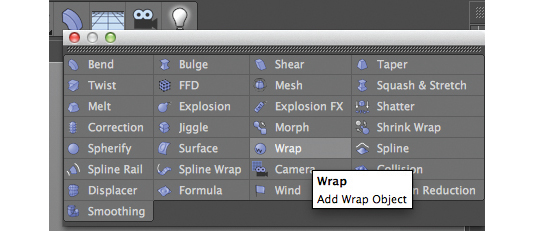
For this project, we want to transform our flat vector map that we sourced in step one into more of a three-dimensional globe shape. To do this, we'll apply a wrap effect. In Cinema 4D Lite navigate to Create>Deformer>Wrap. In the object menu drag this so that it's nested below the spline object from Illustrator.
05. Change the wrap settings
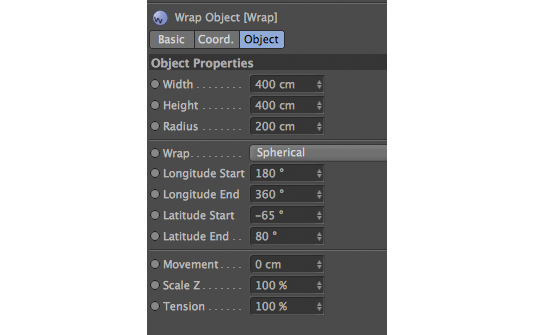
In the Object Properties panel for the Wrap deformer, change the following settings - Wrap: Spherical, Latitude Start: -65, Latitude End: 80. We also need to create some geometry. Duplicate the original spline and go to Create>NURBS>Extrude NURBS.
06. Amend the geometry further
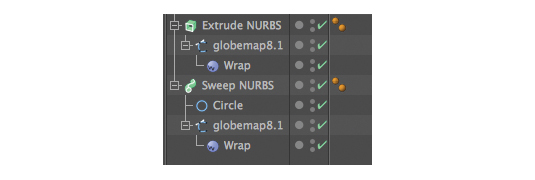
We need one more piece of geometry for the outline. Go to Create>NURBS>Sweep NURBS, and then to Create>Spline>Circle. Put this circle and the original spline below the sweep NURBS as the parent. Make sure the circle is first and its radius is 1cm.
07. Adding animation
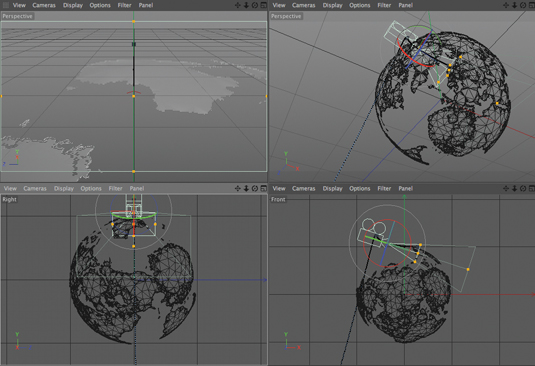
To add some animation to this piece, we are going to create a camera move within Cinema 4D Lite. Go to Create>Camera>Camera. I've created a simple zoom-out motion, by zooming in on the display panel, setting a keyframe on frame 0, and then going to the end frame and doing the same.
08. Prepare the render passes
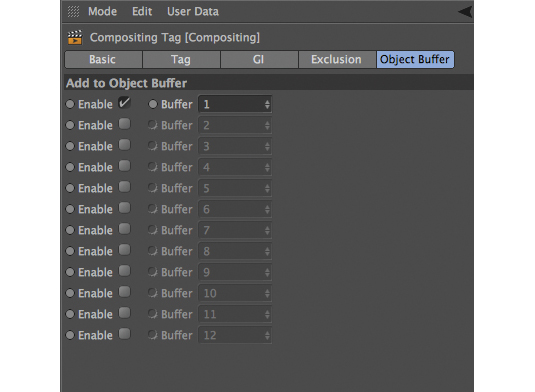
At this stage, we can now get the render passes ready for After Effects CC. To do so, right-click on both the Sweep NURBS and Extrude NURBS. Next, navigate to Cinema 4D Tags>Compositing Tags. For each of these go to Object Buffer and set them each to '1' and '2'.
09. Depth of field
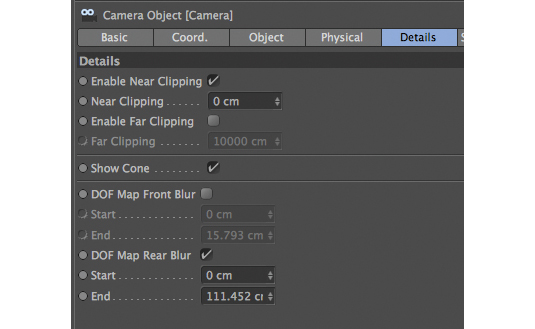
After Effects CC is also great at creating depth of field, which takes a lot longer to render inside C4D. To take full advantage of this, select the camera we created earlier. Click on the Details tab in Object Properties and select DOF Map Rear Blur. Play with the start and end values to make sure it focuses on the globe you've created.
10. Last little bits in Cinema 4D Lite

Now for the final Cinema 4D Lite set up. Go to Render>Edit Render Settings. Click the Multi-Pass tab and add two object buffers, making sure that you change the values to 1 and 2 respectively. Tick the Depth option, and make sure the Multi-Pass box is checked too. Now save the C4D file.
11. Compositing
Now we are ready to composite. Open up Adobe After Effects CC. Create a new composition, go to File>Import and select the Cinema 4D file you just created. Drag it onto the composition timeline.
12. Get the render layers
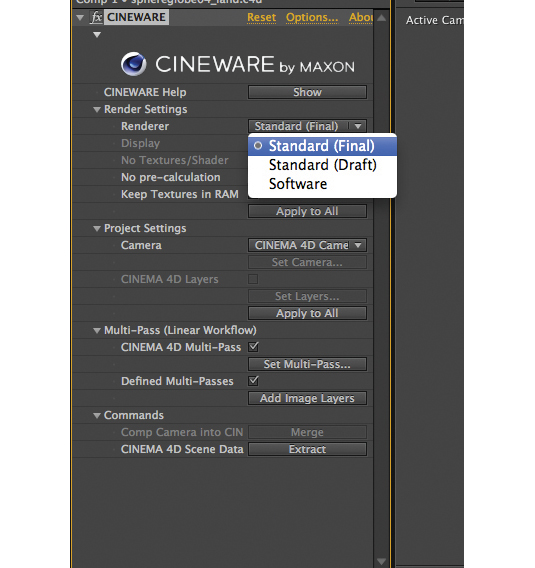
To get the render layers we created earlier, change Renderer to Standard (Final), and click the Cinema 4D Multi-Pass checkbox as well as Defined Multi-Passes. Then click Add Image Layers. You should now have both the object buffers and your depth pass.
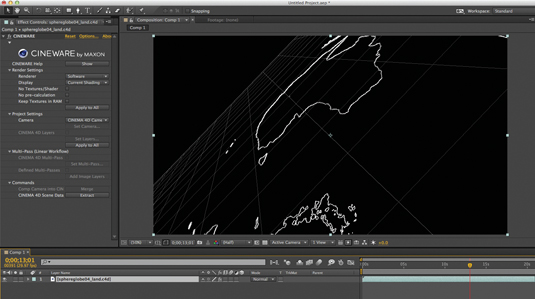
13. Add an X-ray feel

Put the outline's object buffer above the land mesh and set the blending mode to Screen. Turn the layer opacity of the land down to around 50 per cent. This gives us a nice X-ray type feel and full control over all of the values within After Effects CC.
14. Using Camera Lens Blur
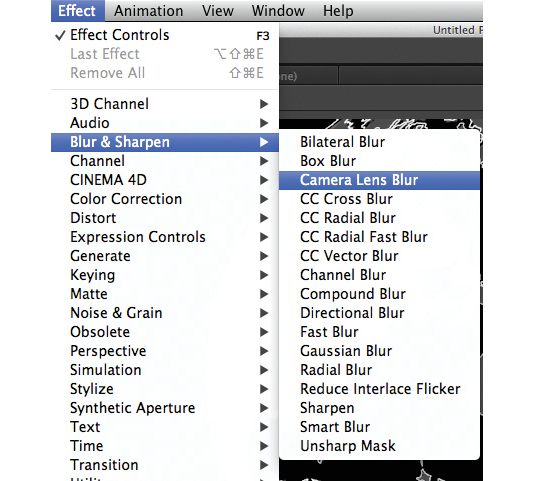
Now we want to take full advantage of the depth of field options within After Effects CC. Go to Layer>New>Adjustment Layer. Make sure it's the top layer and then go to Effect> Blur>Camera Lens Blur.
15. Adjustment Layer controls
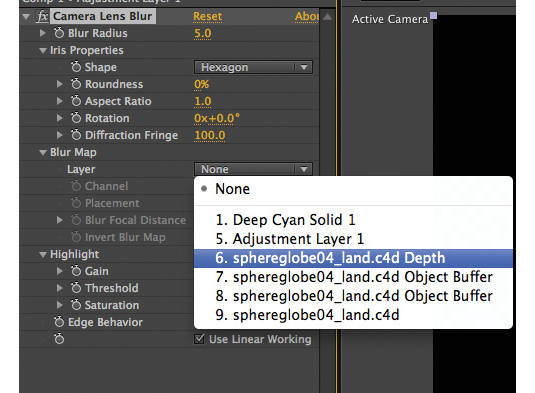
Click on the adjustment layer and go to Effect Controls. Under the Blur Map layer select the depth multi-pass layer we created. Set the Blur Radius to 7. We now have depth of field driven by the Cinema 4D scene camera. If you want to amend the settings, simply open the C4D file and then save it.
16. Importing camera data
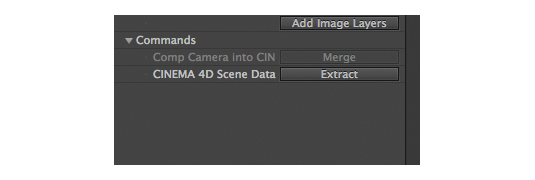
Another great part of Cinema 4D Lite and After Effects CC is the ability to directly import camera data. To do this, click the original layer and navigate to Effect Controls. Under the Commands drop-down menu, select the Cinema 4D Scene Data option and click on Extract.
17. Experiment with different elements
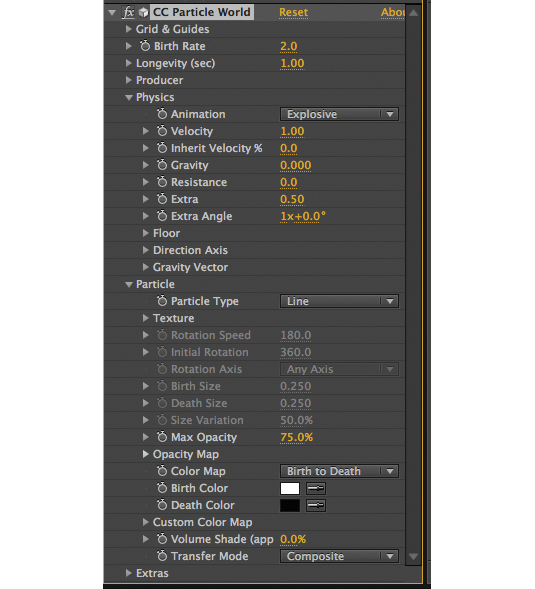
This will enable us to include After Effects CC elements. To demonstrate how this is useful, go to Layer>Solid, then go to Effect>CC Particle World. In the Effect Settings, go to Physics and change Gravity to 0. You can experiment with the other settings - I've changed Birth Color to while and Death Color to black.
18. Adding glow
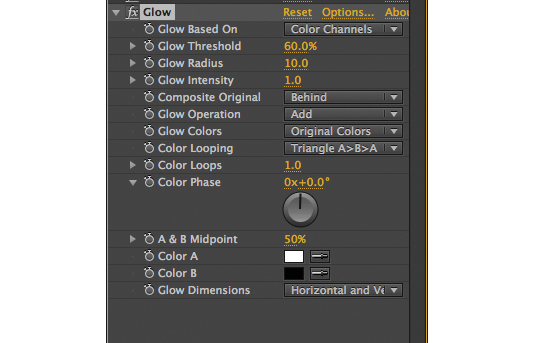
This layer could also be set to a Screen blending mode. Now we're going to add some other basic cosmetic effects. Click on the adjustment layer and go to Effect>Stylize>Glow. For this, experiment with the blur threshold, radius and intensity until you're happy with the result.
19. Adding colour

Insert a coloured solid by going to Layer>New>Solid. I've chosen a turquoise colour, set it as the top layer and chosen a Screen blending mode. The project is pretty much ready to render now.
20. Keep your file size low
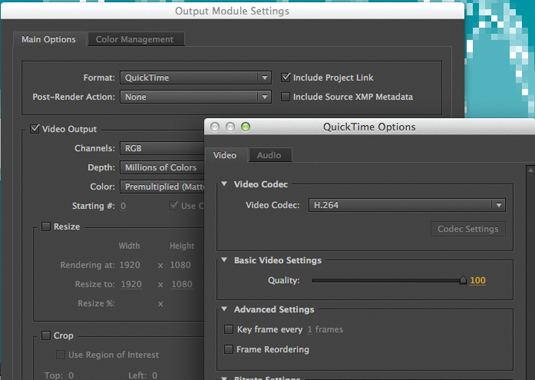
In your render settings, make sure you have set the video codec field to H.264. This should keep the file size below 50MB. This is crucial for the next steps, which involve uploading to Behance.
21. Tweaked with plug-ins

As you may notice, my screenshot looks slightly different. I've used third party plugins like Video Co-Pilot Optical Flares and Trapcode Starglow. I also used an Xpresso particle set up with hair render from C4D, which I was really happy to learn is also supported by AE CC.
22. Uploading to Behance
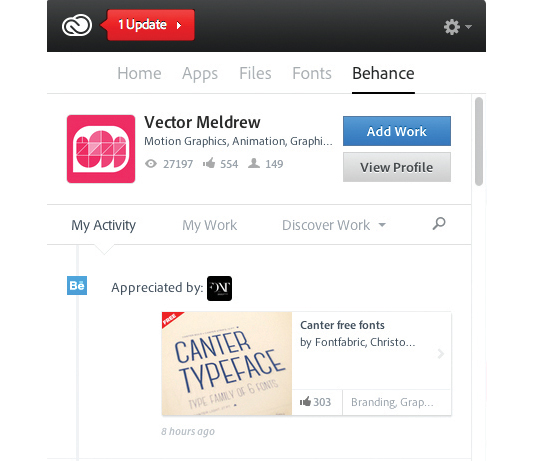
Relatively speaking, it's easier than before to upload your work to Behance now that its owned by Adobe. Click on the Creative Cloud icon on your top menu bar. Log in to Behance with your details or register for a new account. Now click on the Add Work button.
23. Coming soon...
In Behance, you will also notice an option on the left called Creative Cloud. Soon there will be a feature that enables you to directly store your files on the cloud and then import straight to Behance, without the need for an external upload.

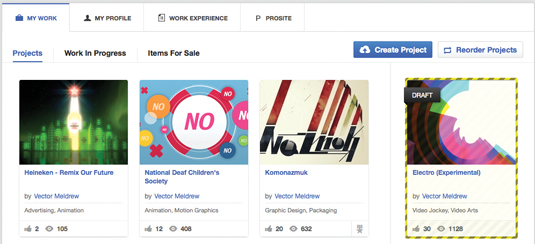
You will be taken to a new window within your Behance profile. Click on the blue Create Project button. You will then be asked to Upload Files. Navigate to the file on your desktop. If your file is larger than 50MB then it's advisable to put it through a service like Vimeo or YouTube and then use the Embed Media option.
25. Increasing your visibility

Finally add some descriptive text about the project and maybe some links to your portfolio site. Click Continue to add a cover image, and then some more details. Creative fields, project tags and project description are great ways to help people find your work via Behance's search feature, so try and be descriptive.
26. And relax!
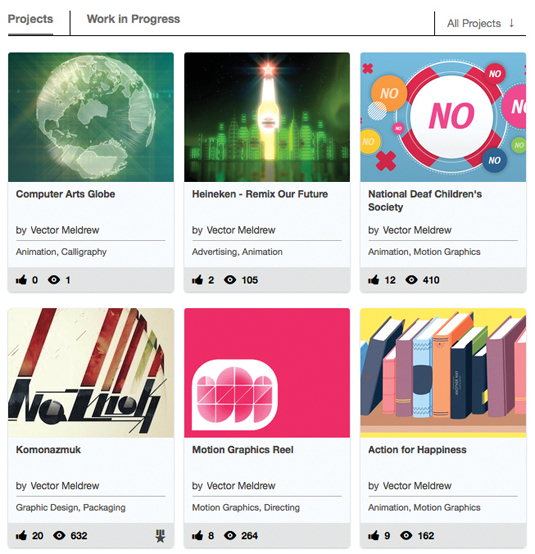
You are now ready to publish. Congratulations you have successfully created a project and promoted it all via Adobe Creative Cloud.
Words: Alex Donne-Johnson
Also known as Vector Meldrew, Alex Donne-Johnson is an animation
director based in London, working with clients such as Adidas, Red Bull, Activision and WaterAid.
This article was originally published in The Ultimate Guide To Adobe Creative Cloud.
Now read these:
- Designers speak out about Adobe's Creative Cloud
- New tools in Adobe Creative Cloud: 12 revealing videos
- Free Photoshop actions to create stunning effects
Video Copilot Element 3d Motion Design Pack
Source: https://www.creativebloq.com/3d/how-create-stunning-3d-motion-graphic-ident-11135301
Posted by: thompsonwhirds.blogspot.com
0 Response to "Video Copilot Element 3d Motion Design Pack"
Post a Comment